Introduction
In this lesson, we’ll cover common Git commands used to manage your projects and to upload your work onto GitHub. We refer to these commands as the basic Git workflow. When you’re using Git, these are the commands that you’ll use 70-80% of the time. So if you can get these down, you’ll be more than halfway done mastering Git!
Lesson overview
This section contains a general overview of topics that you will learn in this lesson.
- How to create a repository on GitHub.
- How to get files to and from GitHub.
- How to take “snapshots” of your code.
Assignment
Before you start!
- Github recently updated the way it names the default branch. This means you need to make sure you are using a recent version of git (2.28 or later). You can check your version by running:
git --version - If you haven’t already, set your local default git branch to
main. You can do so by running:git config --global init.defaultBranch main - For more information on the change from
mastertomainsee GitHub’s Renaming Repository.
Create the repository
-
You should have already created a GitHub account in the Setting Up Git lesson.
-
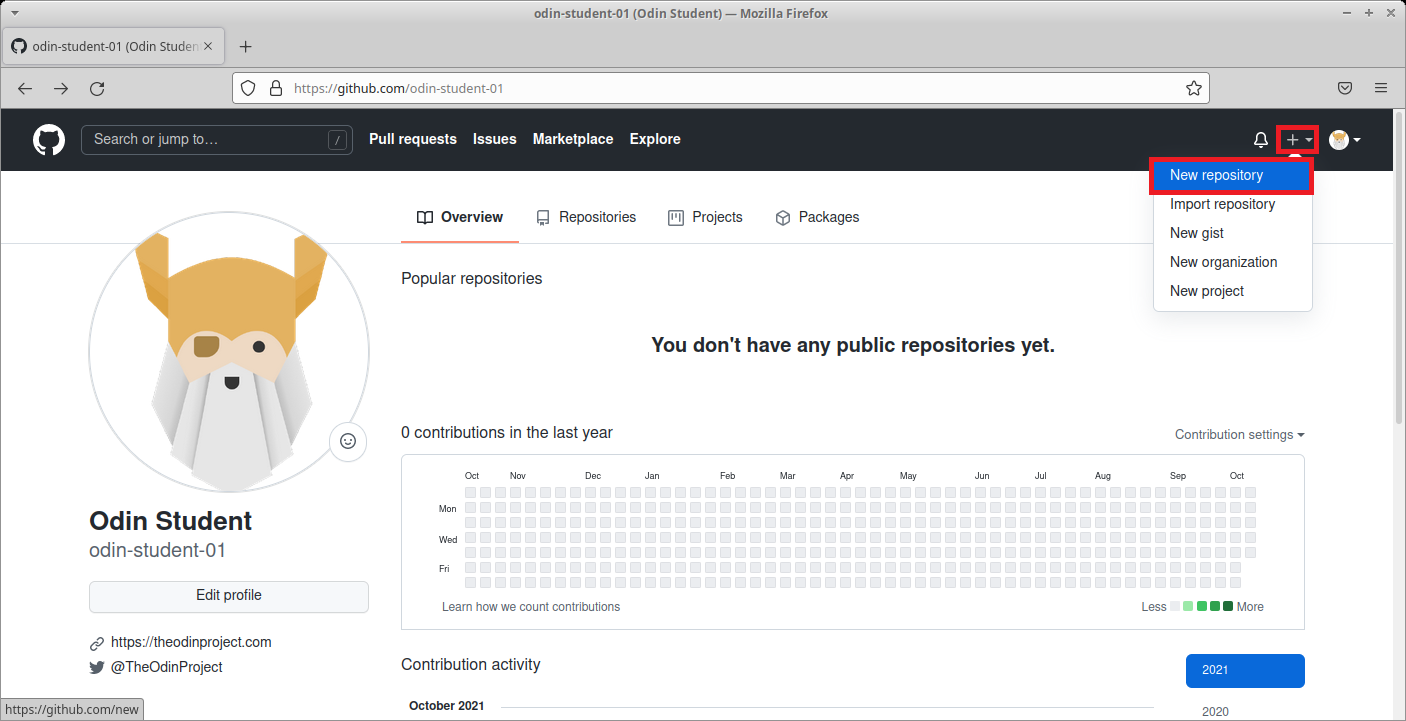
Create a new repository by clicking the button shown in the screenshot below.
-
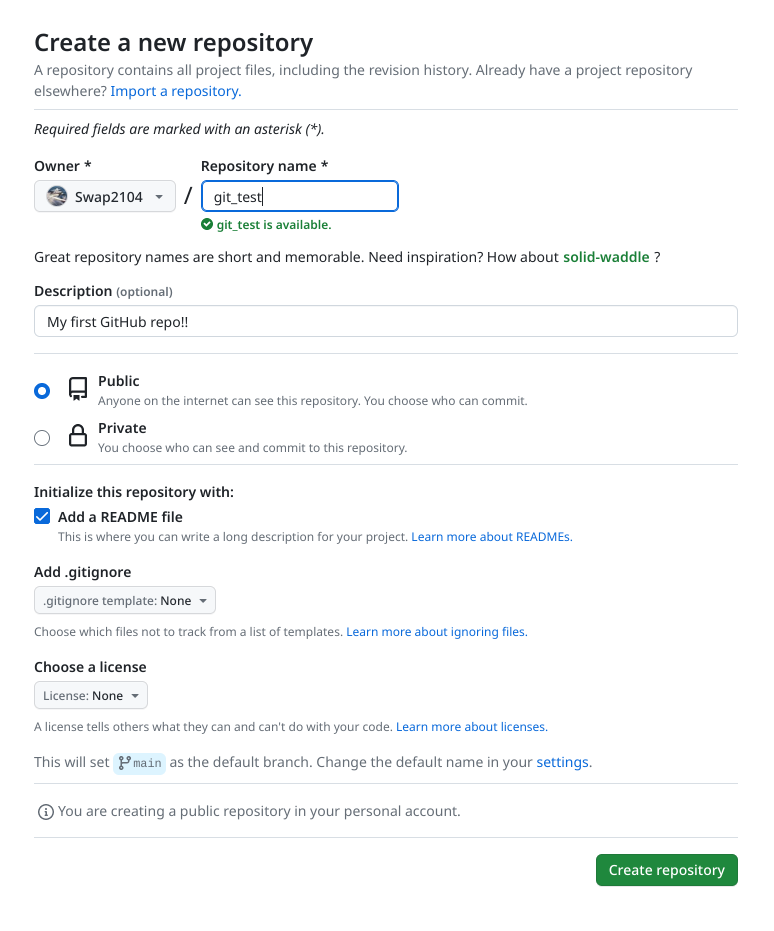
Give your repository the name “git_test” in the repository name input field. Check “Add a README file”. And then create the repository by clicking the “Create repository” button at the bottom of the page.
-
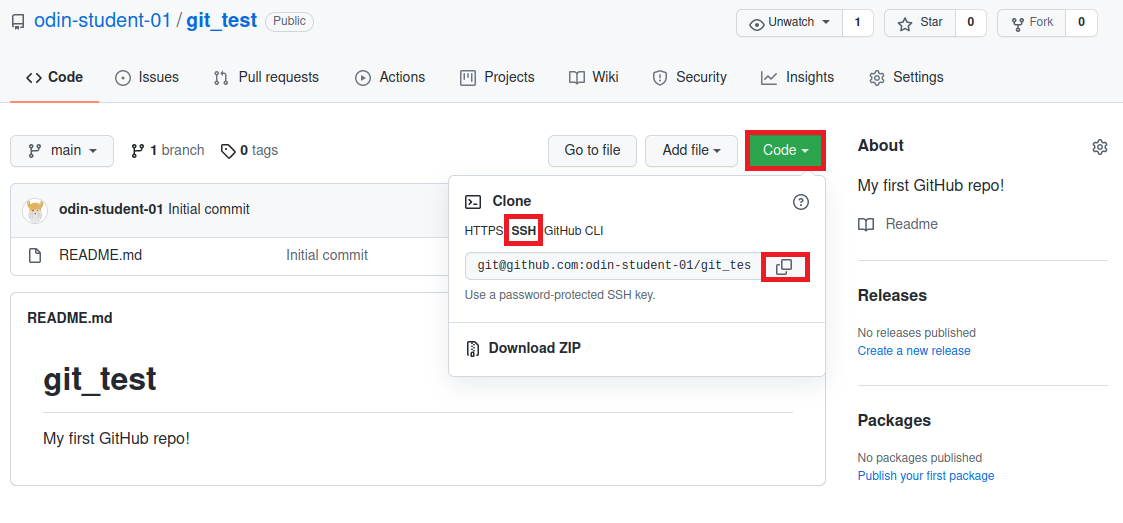
This will redirect you to your new repository on GitHub. To get ready to copy (clone) this repository onto your local machine, click the green “Code” button. Then select the SSH option, and copy the line below it. NOTE: You MUST click the SSH option to get the correct URL.
-
Let’s use the command line on your local machine to create a new directory for all of your Odin projects. Create a directory called
reposwith themkdircommand in your home folder. Your home folder is represented by~. Note that depending on your OS, there may be some home directory variation - sometimes~stands for/Users/your_usernameand sometimes it stands for/home/your_username. If you’re not sure if you’re in your home folder, just typecd ~. Once it’s made, move into it with thecdcommand.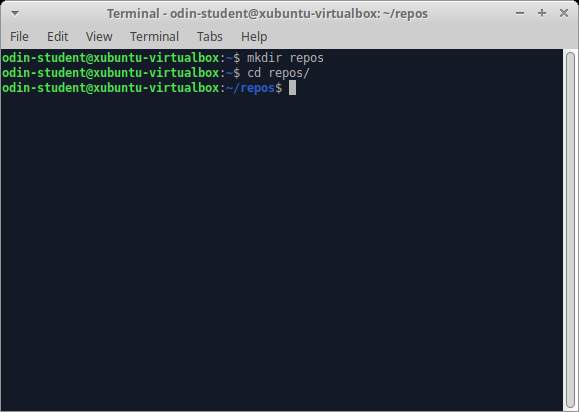
-
Now it’s time to clone your repository from GitHub onto your computer with
git clonefollowed by the URL you copied in the last step. The full command should look similar togit clone git@github.com:USER-NAME/REPOSITORY-NAME.git. If your URL looks likehttps://github.com/USER-NAME/REPOSITORY-NAME.git, you have selected the HTTPS option, not the required SSH option.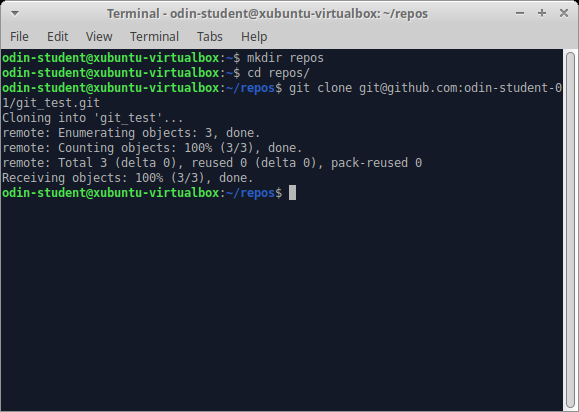
-
That’s it! You have successfully connected the repository you created on GitHub to your local machine. To test this, you can
cdinto the new git_test folder that was downloaded and then entergit remote -von your command line. This will display the URL of the repository you created on GitHub, which is the remote for your local copy. You may have also noticed the word origin at the start of thegit remote -voutput, which is the name of your remote connection. The name “origin” is both the default and the convention for the remote repository. But it could have just as easily been named “party-parrot” or “dancing-banana”. (Don’t worry about the details of origin for now; it will come up again near the end of this tutorial.)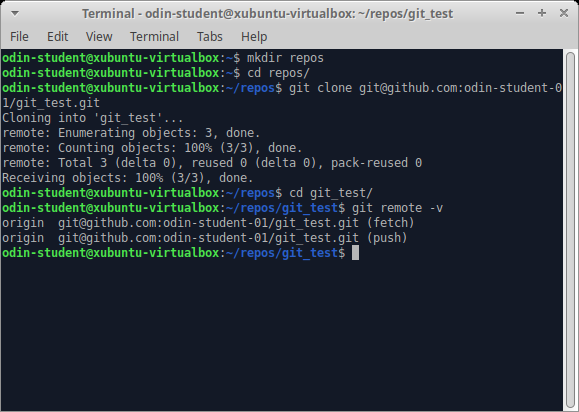
Use the Git workflow
-
Create a new file in the
git_testfolder called “hello_world.txt” with the commandtouch hello_world.txt.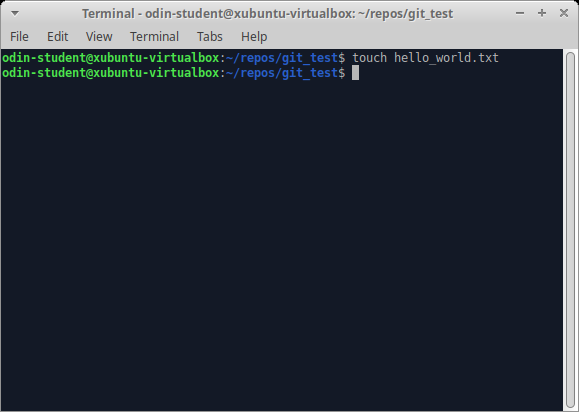
-
Type
git statusin your terminal. In the output, notice that your hello_world.txt file is shown in red, which means that this file is not staged.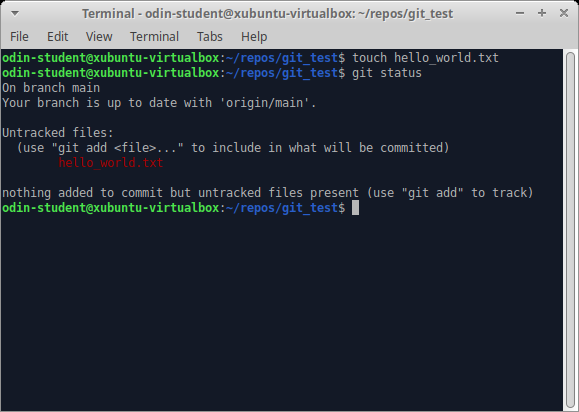
-
Type
git add hello_world.txt. This command adds your hello_world.txt file to the staging area in Git. The staging area is part of the two-step process for making a commit in Git. Think of the staging area as a “waiting room” for your changes until you commit them. Now, typegit statusagain. In the output, notice that your file is now shown in green, which means that this file is now in the staging area.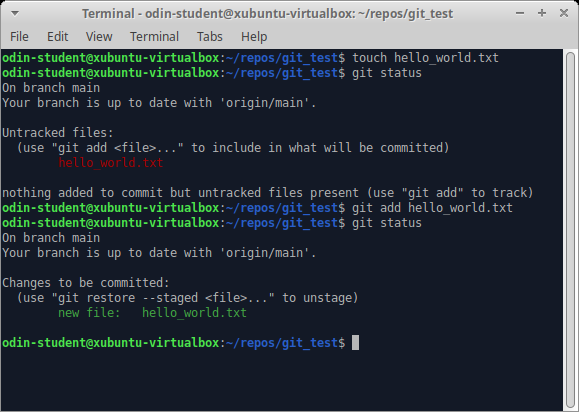
-
Type
git commit -m "Add hello_world.txt"and then typegit statusonce more. The output should now say: “nothing to commit, working tree clean”, indicating your changes have been committed. Don’t worry if you get a message that says “upstream is gone”. This is normal and only shows when your cloned repository currently has no branches. It will be resolved once you have followed the rest of the steps in this project.The message, “Your branch is ahead of ‘origin/main’ by 1 commit” just means that you now have newer snapshots than what is on your remote repository. You will be uploading your snapshots further down in this lesson.

-
Type
git logand look at the output. You should see an entry for your “Add hello_world.txt” commit. You will also see details on the author who made the commit and the date and time of when the commit was made. If your terminal is stuck in a screen with (END) at the bottom, just press “q” to escape. You can configure settings for this later, but don’t worry about it too much for now.
Modify a file or two
-
Open README.md in your text editor of choice. In this example, we will open the directory in Visual Studio Code by using the command
code .inside your repository.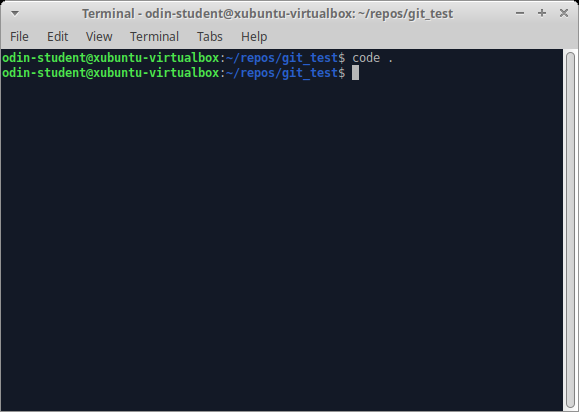
MacOS users: If your terminal reads “command not found: code”, you must head back to Command Line Basics and follow the instructions provided to allow this command to work.
-
Add “Hello Odin!” to line 3 of README.md and save the file with Ctrl + S (Mac: Cmd + S).

-
Go back to your terminal or if you’re using Visual Studio Code you can open the built-in terminal by pressing Ctrl + ` (backtick). Then type
git status. You’ll notice that README.md is now shown as not staged or committed.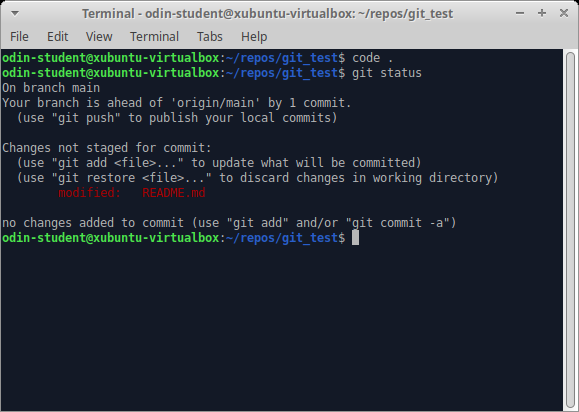
-
Add README.md to the staging area with
git add README.md. -
Can you guess what
git statuswill output now? README.md will be displayed in green text. That means README.md has been added to the staging area. The file hello_world.txt will not show up because it has not been modified since it was committed.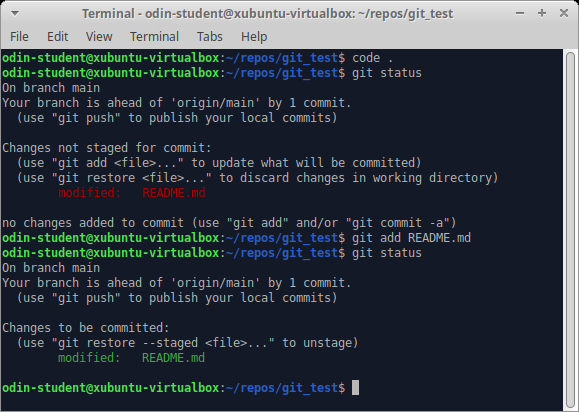
-
Open hello_world.txt, add some text to it, save it and stage it. You can use
git add .to add all files in the current directory and all subsequent directories to the staging area. Then, typegit statusonce more, and everything should now be in the staging area.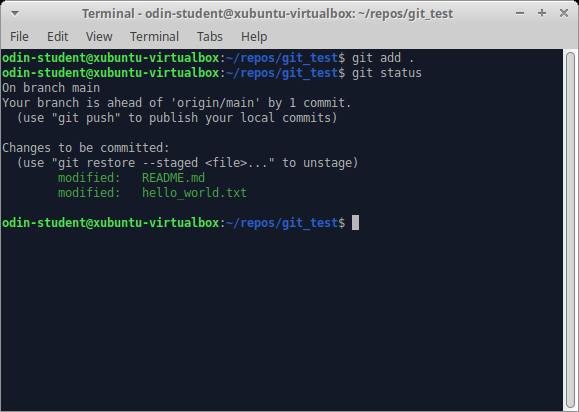
-
Finally, let’s commit all of the files that are in the staging area and add a descriptive commit message.
git commit -m "Edit README.md and hello_world.txt". Then, typegit statusonce again, which will output “nothing to commit”.
-
Take one last look at your commit history by typing
git log. You should now see three entries.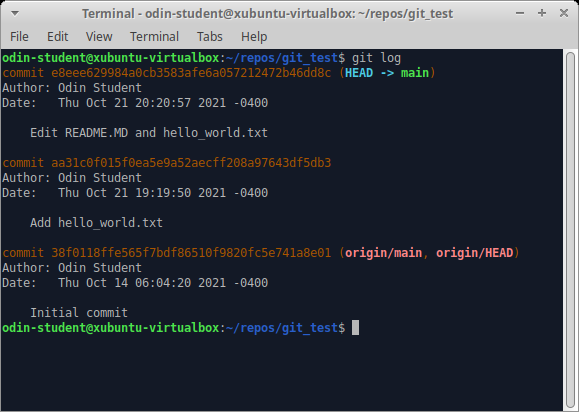
Push your work to GitHub
Finally, let’s upload your work to the GitHub repository you created at the start of this tutorial.
-
Type
git push. To be more specific, typegit push origin main. Since you are not dealing with another branch (other than main) or a different remote (as mentioned above), you can leave it asgit pushto save a few keystrokes. NOTE: If at this point you receive a message that says “Support for password authentication was removed on August 13, 2021. Please use a personal access token instead.”, you have followed the steps incorrectly and cloned with HTTPS, not SSH. Please follow the steps for switching remote URLs from HTTPS to SSH to change your remote to SSH, then attempt to push to Github.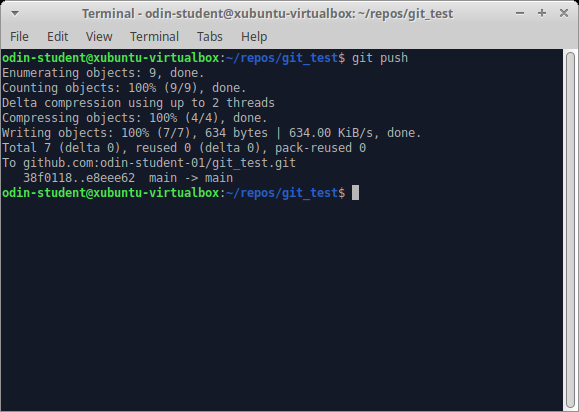
-
Type
git statusone final time. It should output “Your branch is up to date with ‘origin/main’. nothing to commit, working tree clean”.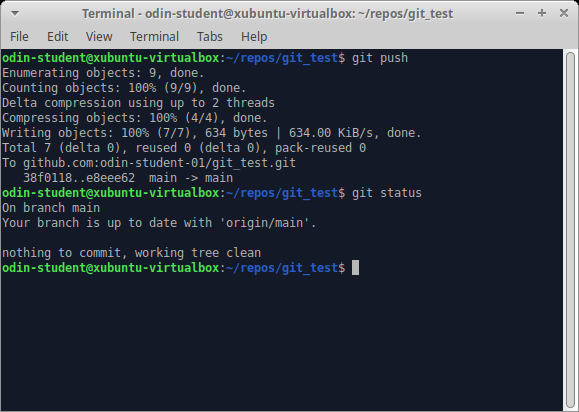
-
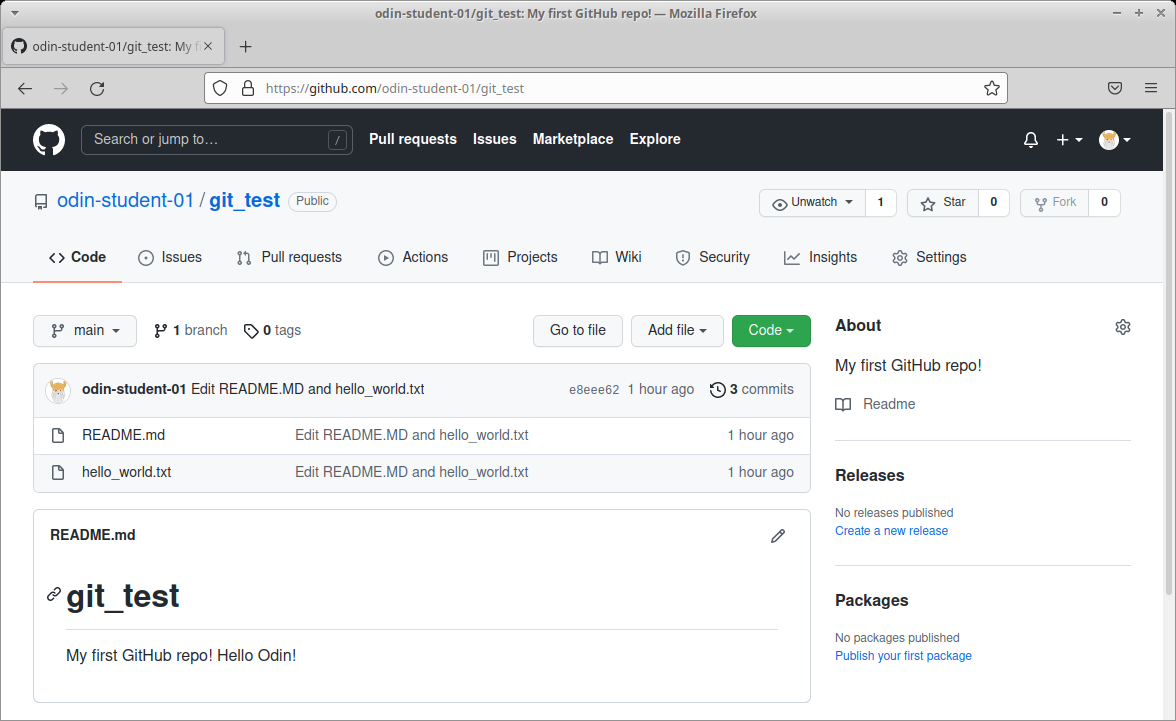
When you reload the repository on GitHub, you should see the README.md and hello_world.txt files that you just pushed there from your local machine.
Avoid editing directly on GitHub
When trying to make quick changes to the files in your repo, such as attempting to fix a typo in your README.md you might be tempted to make this change directly via Github. However, it is best to avoid this as it will cause issues that require more advanced Git knowledge than we want to go over at this stage (it is covered in a future lesson), for now it is advised to make any changes via your local files then commit and push them using Git commands in your terminal once ready.
Cheatsheet
This is a reference list of the most commonly used Git commands. (You might consider bookmarking this handy page.) Try to familiarize yourself with the commands so that you can eventually remember them all:
- Commands related to a remote repository:
git clone git@github.com:USER-NAME/REPOSITORY-NAME.gitgit pushorgit push origin main(Both accomplish the same goal in this context)
- Commands related to the workflow:
git add .git commit -m "A message describing what you have done to make this snapshot different"
- Commands related to checking status or log history
git statusgit log
The basic Git syntax is program | action | destination.
For example,
git add .is read asgit | add | ., where the period represents everything in the current directory;git commit -m "message"is read asgit | commit -m | "message"; andgit statusis read asgit | status | (no destination).
Git best practices
There’s a lot to learn about using Git. But it is worth taking the time to highlight some best practices so that you can be a better collaborator. Git is not only helpful when collaborating with others. It’s also useful when working independently. You will be relying more and more on your own commit history in the future when revisiting old code.
Two helpful best practices to consider are atomic commits and leveraging those atomic commits to make your commit messages more useful to future collaborators.
An atomic commit is a commit that includes changes related to only one feature or task of your program. There are two main reasons for doing this: first, if something you change turns out to cause some problems, it is easy to revert the specific change without losing other changes; and second, it enables you to write better commit messages. You’ll learn more about what a good commit message looks like in a future lesson!
Changing the Git commit message editor
If you are using Visual Studio Code (and you should be if you’re following this curriculum), there’s a way to ensure that if you use git commit without the message flag (-m), you won’t get stuck writing your commit message in Vim.
Changing the default message editor is a good idea in case you accidentally omit the flag, unless you prefer using Vim. There is no downside to changing it, because you will have the option to write your commit messages in the terminal or in the comfort of VS Code.
The following command will set this configuration. Type (or copy & paste) this command into your terminal and hit Enter.
git config --global core.editor "code --wait"
There will be no confirmation or any output on the terminal after entering this command.
With that done, you can now choose to use either git commit -m "your message here" or git commit to type your message with Visual Studio Code!
To make a commit with Visual Studio Code as the text editor, just type git commit. After you hit Enter a new tab in VS Code will open for you to write your commit message. You may provide more details on multiple lines as part of your commit message. After typing your commit message, save it Ctrl + S (Mac: Cmd + S) and close the tab. If you return to the command line, you will see your commit message and a summary of your changes.
Knowledge check
The following questions are an opportunity to reflect on key topics in this lesson. If you can’t answer a question, click on it to review the material, but keep in mind you are not expected to memorize or master this knowledge.
- How do you create a new repository on GitHub?
- How do you copy a repository onto your local machine from GitHub?
- What is the default name of your remote connection?
- Explain what
originis ingit push origin main. - Explain what
mainis ingit push origin main. - Explain the two-stage system that Git uses to save files.
- How do you check the status of your current repository?
- How do you add files to the staging area in git?
- How do you commit the files in the staging area and add a descriptive message?
- How do you push your changes to your repository on GitHub?
- How do you look at the history of your previous commits?
Additional resources
This section contains helpful links to related content. It isn’t required, so consider it supplemental.
- Complete Git and GitHub Tutorial from Basics to Advanced - by Kunal Kushwaha
- Git - Reference
- GitHub guide on adding locally hosted code walks you through creating a git repository from a local folder and adding it to GitHub.