Introduction
Throughout the lessons, we’ve learned how to manage state, and pass data and props between components. However, as our application grows in size, not only will this process of managing states and passing data around become repetitive and inconvenient, but it will also be hard to manage. In the React Router lesson, we mentioned how we could use outlet context to pass data from a parent component through an <Outlet /> to a child component. This lesson will cover how we can use the Context API to do similar things outside of outlet scenarios.
Lesson overview
This section contains a general overview of topics that you will learn in this lesson.
- Using the Context API to pass state and data deep into React components.
- Real-world application of the Context API.
- Drawbacks of using the Context API.
Why do we need Context API
The Context API in React is a feature that allows you to manage the global state of your application without the need to pass data through multiple levels of components using props. It provides a way to share data and functionality across different components, regardless of where they are located in the component tree.
To give a more concrete example, let’s go back to a project that we’ve already built previously. In the Shopping Cart project, you might have a Product Detail Page that might or might not look like this very awesome shop:
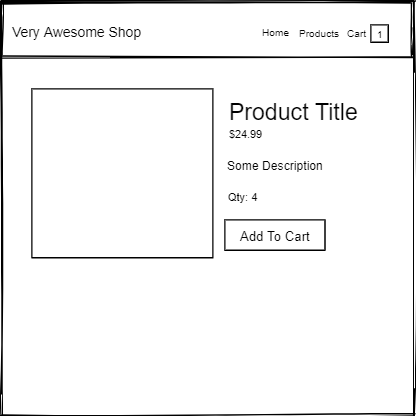
You have a counter in the header that displays the number of items currently in the cart. You can add items to the cart through the “Add to Cart” button.
For the examples below, we will omit the routing that we did in the project and other components that are not necessary for our examples. We will just look at the code relevant to this lesson.
As we already know, if we want the state to persist and be shared between components, what we want to do is to Lift the state up to a common ancestor/parent.
Our application code might look like this:
import { useState } from "react";
// other imports for Header and ProductDetail

export default function App() {
  const [cartItems, setCartItems] = useState([
    /* List of Items in Cart */
  ]);
  const products = /* some custom hook that fetches products and returns the fetched products */

  const addToCart = (product) => {
    // add to cart logic (this adds to cartItems)
  };

  return (
    <>
      <Header cartItemsCount={cartItems.length} />
      <ProductDetail addToCart={addToCart} products={products} />
    </>
  );
}
Let’s focus on the Header and ProductDetail components.
Our Header might look like this:
// import for Link

function Links({ cartItemsCount }) {
  return (
    <ul>
      {/* Links */}
      <li>
        <Link to="Link to the cart">
          <span>Cart</span>
          <div className="cart-icon">{cartItemsCount}</div>
        </Link>
      </li>
    </ul>
  );
}

export default function Header({ cartItemsCount }) {
  return (
    <header>
      {/* Other header elements */}
      <nav>
        <Links cartItemsCount={cartItemsCount} />
      </nav>
    </header>
  );
}
Our ProductDetail component:
export default function ProductDetail({ products, addToCart }) {
  const product = products.find(/* Logic to find the specific product */);

  return (
    <div>
      {/* Image of the product */}
      <div>
        {/* elements that align with the design */}
        <button type="button" onClick={() => addToCart(product)}>
          Add to Cart
        </button>
      </div>
    </div>
  );
}
Great. This is a very common pattern, we pass data/functions between components, nothing too complicated. But there’s a lot to micro-manage, a lot of components that you need to pass props to, and there’s even a little bit of prop drilling that’s happening, where the cartItemsCount is passed from App -> Header -> Links.
So far, what we’ve done in the App component is:
- Pass
productsandaddToCartdown to theProductDetailcomponent - Pass
cartItemsCountdown to theHeadercomponent and theLinkscomponent that is part of theHeader
This is a very basic application, but imagine the application grows in size as more features are added, say in the Product Detail Page. There will be a lot more components to nest, and potentially more nested props. What if we have a Cart component and a ProductListing component? What if we added more functionalities other than just addToCart? It can get repetitive and complex because, as we all know, more features equal more complexities. This is especially frequent in component-based frameworks since we’re more inclined to create separate reusable components instead of inlining elements, which in turn creates more nesting and passing of props.
Implementing Context API
To simplify our application and reduce complexity, we can implement the Context API. There are three key elements in this API that we need to understand:
createContext- This “creates the context” Duh… But yes, it’s how we can create the context. It takes in any value, be it a number, string, or object, which can be referred to as the default value of the context, and returns a context object that can be used to pass down data to componentsuseContext- This hook is used to consume data from a context object created bycreateContext. We can use this hook inside our component to retrieve the data that we need. This hook accepts the context object as an argumentContextObject- The context object is a component that accepts a prop calledvalue, which is the context value that’s going to be passed down to the components no matter how deeply they’re nested. In other words, a way to “provide” the context value to these components. Prior to React 19,ContextObject.Providerwas used instead ofContextObject, so wherever you seeProviderwe meanContextObject
We can start by using the createContext function that can be imported from the react module.
import { createContext } from "react";
As we have described earlier, when you create a new context using createContext, you can specify an initial value for the context. This is known as the default value of the context. The default value can be any type of value - a string, number, boolean, or even an object or array. Do note that this default value does not change, it’s static.
In our case, we will be using an object that contains the following shape:
const ShopContext = createContext({
  products: [],
  cartItems: [],
  addToCart: () => {},
});
In this example, our default value is an object with three properties - products, cartItems, and addToCart. products and cartItems are arrays that will hold the products and items in the user’s cart, respectively. addToCart is a function that will allow us to add items to the cart.
This object that we’ve defined is not necessary. We can of course do this as well and it will not be a problem at all:
const ShopContext = createContext(null);
However, the reason why we’re adding the object, is so that even if we somehow use the context inside a component that is not nested inside a Provider, because we have set a default value, our application will not break (This is also good for testing since we don’t need to wrap a component in a Provider to get a value) and also take advantage of IDE features like auto-completion when we have an object as the value. When we use this context in our components, we will be able to access the properties directly from the context. It’s basically a bonus! It’s up to you if you want to set the default value to the object or just null because we’re going to overwrite this default value anyway.
So how do we use this context? And that is by using the Context object as a component and nesting the children components inside it. In this example, we will remove the props altogether.
import { useState, createContext } from "react";
// other imports for Header and ProductDetail

export const ShopContext = createContext({
  products: [],
  cartItems: [],
  addToCart: () => {},
});

export default function App() {
  const [cartItems, setCartItems] = useState([
    /* List of Items in Cart */
  ]);
  const products = /* some custom hook that fetches products and returns the fetched products */

  const addToCart = (product) => {
    // add to cart logic (this adds to cartItems)
  };

  return (
    /* We are going to pass the things that we want to inject to these components using the value prop */
    /* This value prop will overwrite the default value */
    <ShopContext value={{ cartItems, products, addToCart }}>
      <Header />
      <ProductDetail />
    </ShopContext>
  );
}
Great! Now let’s try to look at our Header component again, we will also remove all the props that we’ve defined earlier, and to retrieve the data, we’ll be using the useContext hook that can be imported in the react module.
import { useContext } from "react";
// import for ShopContext
// import for Link

function Links() {
  const { cartItems } = useContext(ShopContext); // We must pass the ShopContext object itself as an argument

  return (
    <ul>
      {/* Other links */}
      <li>
        <Link to="Link to the cart">
          <span>Cart</span>
          <div className="cart-icon">{cartItems.length}</div>
        </Link>
      </li>
    </ul>
  );
}

export default function Header() {
  return (
    <header>
      {/* Other header elements */}
      <nav>
        <Links />
      </nav>
    </header>
  );
}
We’ve completely removed the prop drill problem, and we can conveniently get the cartItems directly in the Links component itself as we already know that no matter how deeply nested the component is, we can still get the data as long as it’s nested inside the Provider.
Let’s also change our ProductDetail component to do the same:
import { useContext } from "react";
// import for ShopContext

export default function ProductDetail() {
  const { products, addToCart } = useContext(ShopContext);
  const product = products.find(/* Logic to find the specific product */);

  return (
    <div>
      {/* Image of the product */}
      <div>
        {/* elements that align with the design */}
        <button type="button" onClick={() => addToCart(product)}>
          Add to Cart
        </button>
      </div>
    </div>
  );
}
In the Header component, we used useContext() to access cartItems from the ShopContext. Similarly, in the ProductDetail component, we can use the products and addToCart function.
With this implementation, we no longer need to pass down props from the App component to the Header and ProductDetail components. The Header and ProductDetail components can access the cartItems state and addToCart function from the ShopContext.
Overall, the implementation of the Context API has allowed for a more efficient, cleaner, and streamlined way of passing down data across multiple components. By using the createContext() function and the useContext() hook, we can easily pass down state and functions to child components without the need for prop drilling. It’s also more centralized since we’re keeping our data in a single location. All of these make our code easier to reason about.
Drawbacks of using Context API
Although the Context API can be a powerful tool for managing state in larger React applications, it also has some drawbacks that you should be aware of:
- It can lead to performance issues: When you update the state in a context, it can cause all components that are consuming that context to re-render, even if the state that they are using hasn’t changed. This can lead to performance issues, especially if you have a lot of components that are consuming the same context.
- It can make your code harder to follow: With the Context API, it’s easier to access the state from any component in your application. However, this can also make your code harder to follow, especially if you have a lot of nested components that are consuming the same context. It’s important to keep your code organized and well-structured to avoid confusion.
Potential solutions
- Use multiple smaller contexts instead of a single large context. Instead of using a single large context to manage all of your application states, consider using multiple smaller contexts to manage related pieces of state. This can help to reduce the number of components that are consuming the context and minimize unnecessary re-renders.
- Sometimes Context API might not even be the best solution for the problems that we want to deal with. Take a look at React Component Composition article by Robin Wieruch.
- You can rely on external state management systems like Zustand and Redux. They have a lot of optimizations built-in and are feature rich. Unfortunately, they do have a learning curve, and we recommend sticking to the Context API for the rest of this course as it’s still reliable for majority of the projects we’re going to build.
Assignment
- The React Docs provides more engaging examples and possible optimizations for the Context API. You can check it out by going through their documentation on passing data deeply with Context. Be sure to try out each example!
- Read the short article Prop Drilling by Kent C. Dodds. This is a great article to get more understanding for prop drilling, it features digestible examples.
Knowledge check
The following questions are an opportunity to reflect on key topics in this lesson. If you can’t answer a question, click on it to review the material, but keep in mind you are not expected to memorize or master this knowledge.