Introduction
Now that you’ve had plenty of practice using Grid, we are going to build a full dashboard design. For this project, use whatever tools you need to get it done, but try to lean on Grid for the majority of the layout work. Go back through the lessons or practice assignments if you need a refresher.
Assignment
Step 1: Set up and planning
- Set up your Git repository (refer to past projects if you need a refresher).
- Set up your HTML and CSS files with some dummy content, just to make sure you have everything linked correctly.
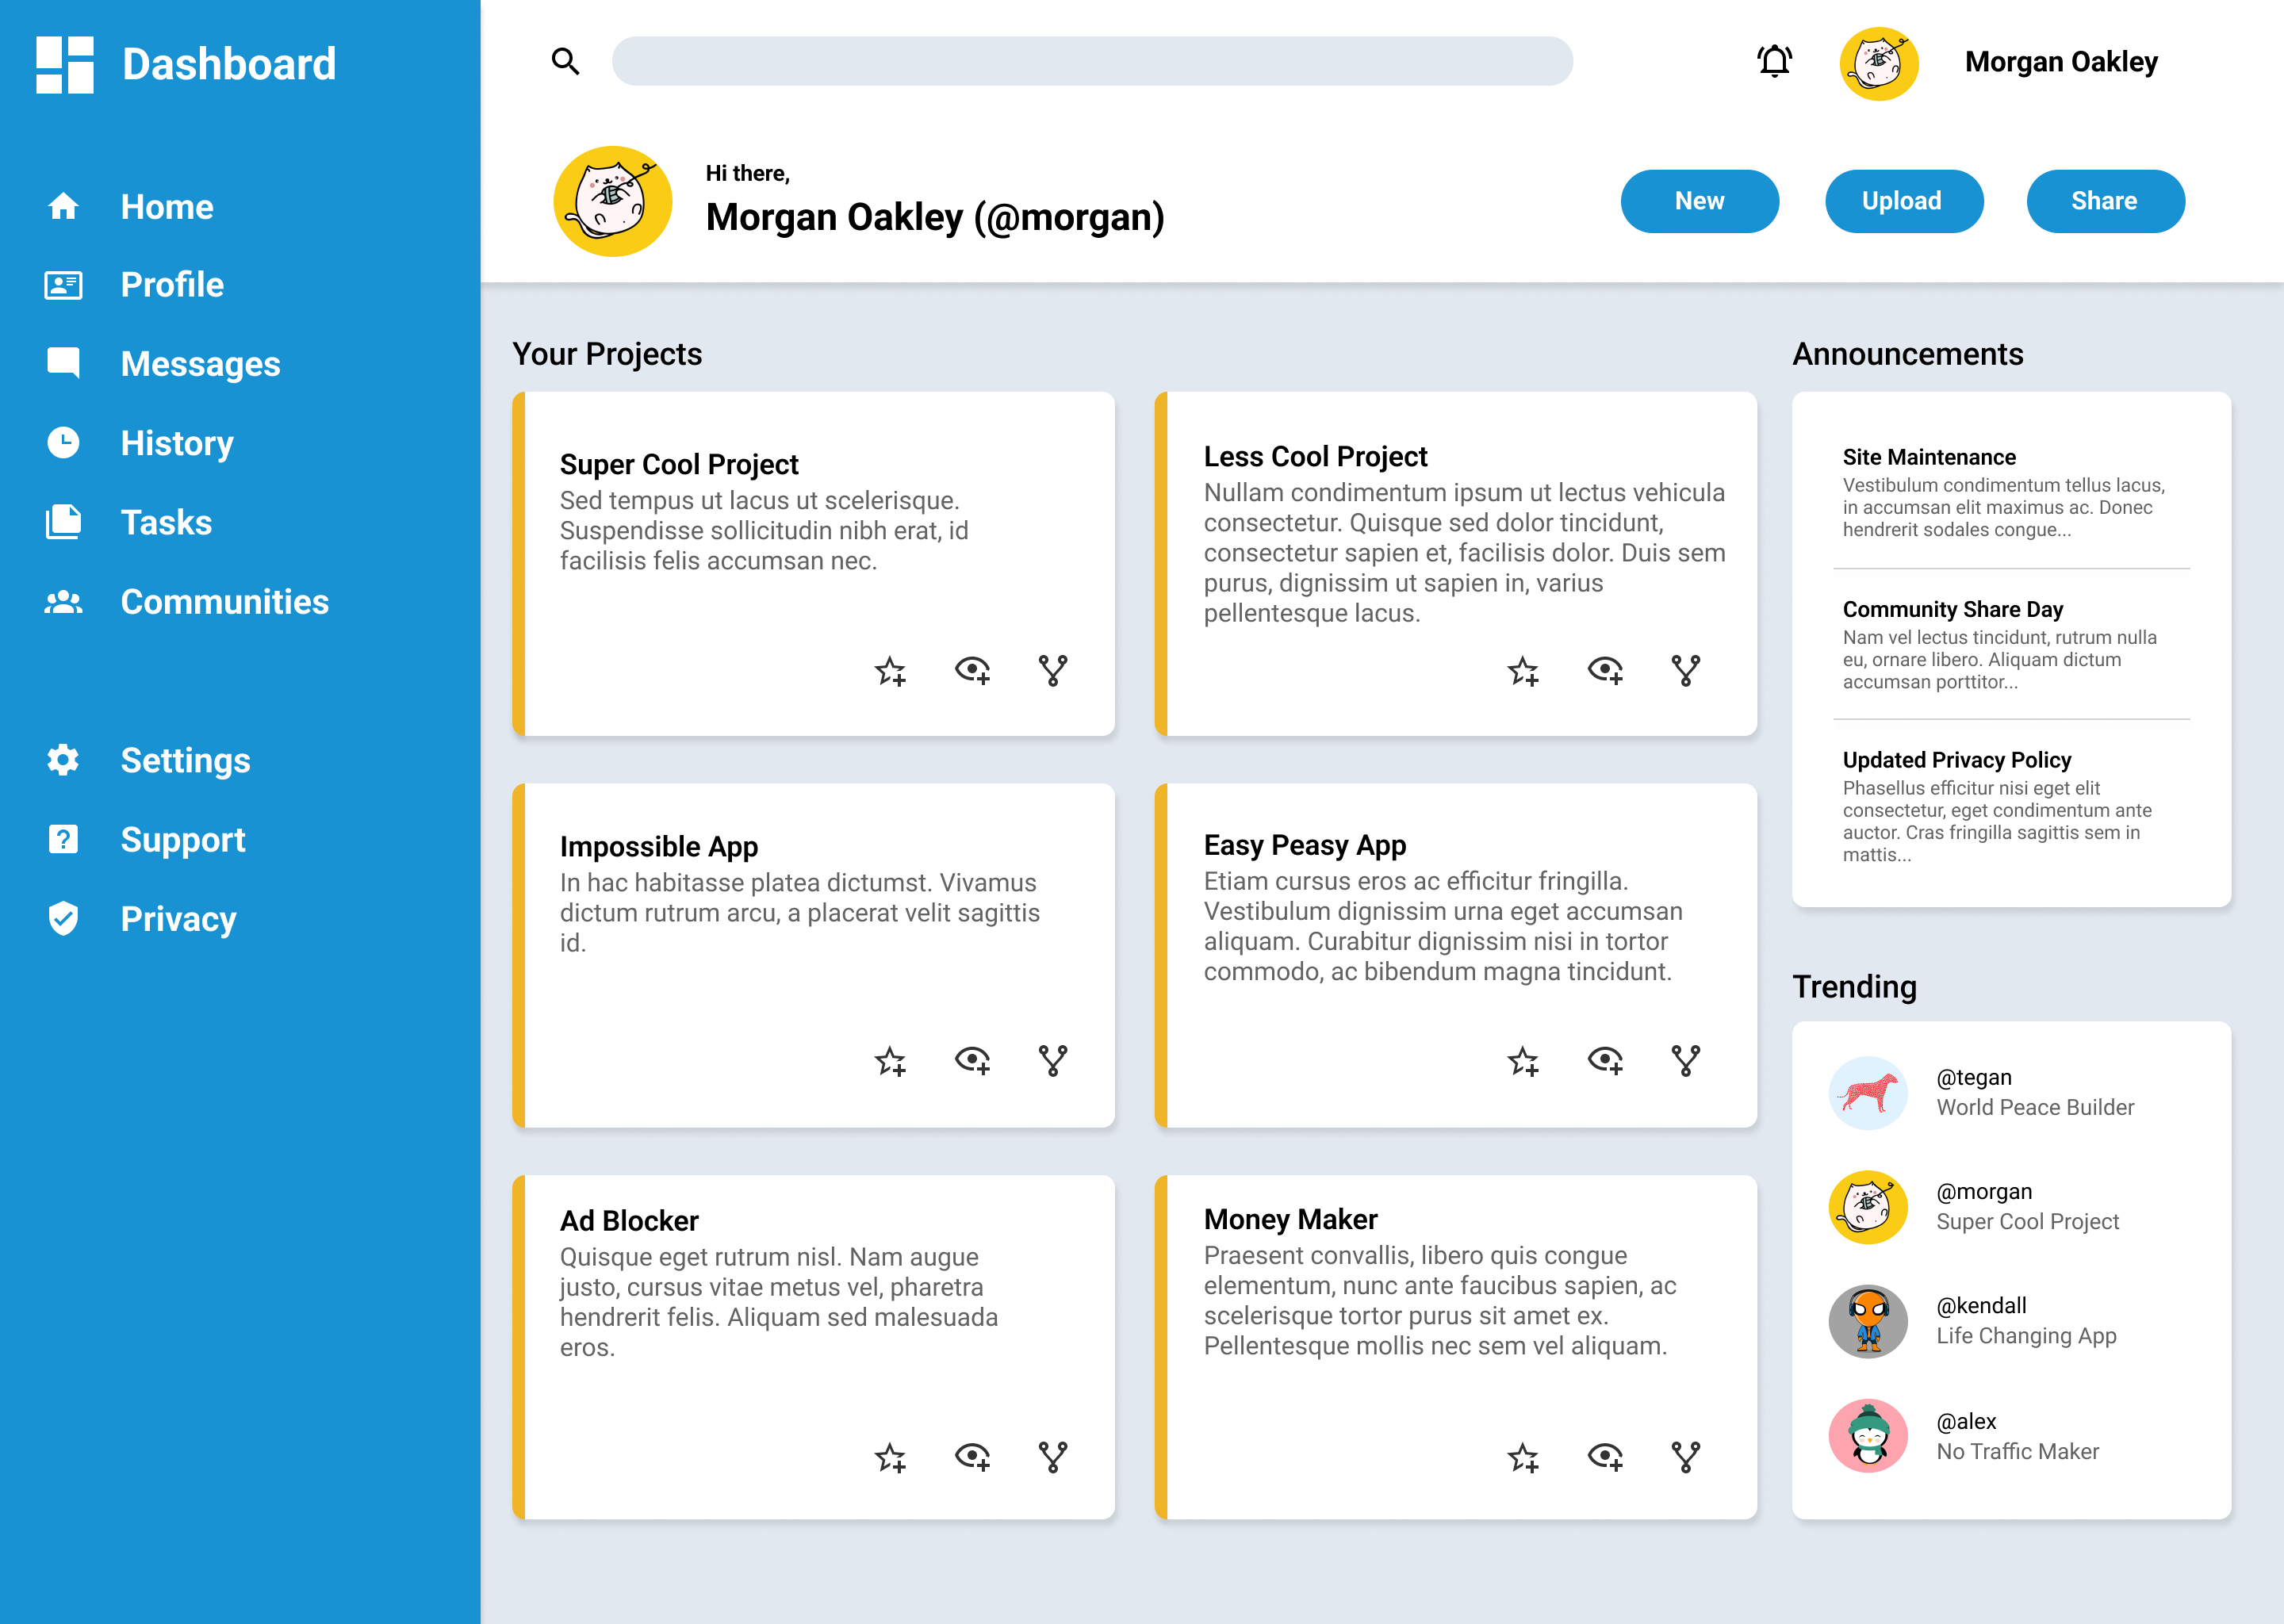
- Download a full-resolution copy of the project design file and get a general idea for how you’re going to need to lay things out in your HTML document.
Step 2: Layout
- Start by writing out the HTML elements for the sidebar, header and main-content containers.
- In your CSS file, apply Grid properties until you have this basic layout built.
Step 3: Nesting
- Taking it one section at a time, begin nesting child elements under the parent elements in the HTML. Remember that you can keep making grid containers within grid containers.
- In the sidebar, use more grids to lay out the navigation and branding sections.
- In the header, use more grids to lay out the search bar, user info and buttons.
- For the main-content, use more grids to lay out the projects, announcements and trending items.
- Fill out some dummy content and placeholder images so you can position all of your grid items.
Step 4: Gather assets
- Once you have your grid layout complete you can either recreate the dashboard example above or style your own design.
- All of the icons and more can be downloaded as SVGs from Material Design Icons.
- Choose your own fonts! The design example uses
Roboto, which is available with Google fonts. (You may want to review the More Text Styles Lesson for information about how to include external fonts in your projects).
Step 5: Some tips!
- When building the layout, apply background colors or borders to your containers to help you visualize your grid.
- It’s up to you whether to use pixels,
frunits or both for your grid tracks. - This project does not have to be responsive, but if you’d like to, you can expand or shrink the project cards section when resizing the browser window.
- You don’t have to make a pixel perfect match with the design example. Consider this an opportunity to practice your CSS skills with your own designs.
- Don’t forget to push your finished dashboard to GitHub. Use GitHub Pages to publish it to the world!
Step 6: Section feedback
- Before you move on, we would love it if you could submit your feedback on the Intermediate HTML and CSS course.